AMBUSH
Killzone Crazy
References: Ranger Handbook TC 3-21.76 | Infantry Rifle Platoon and Squad ATP 3-21.8
Overview
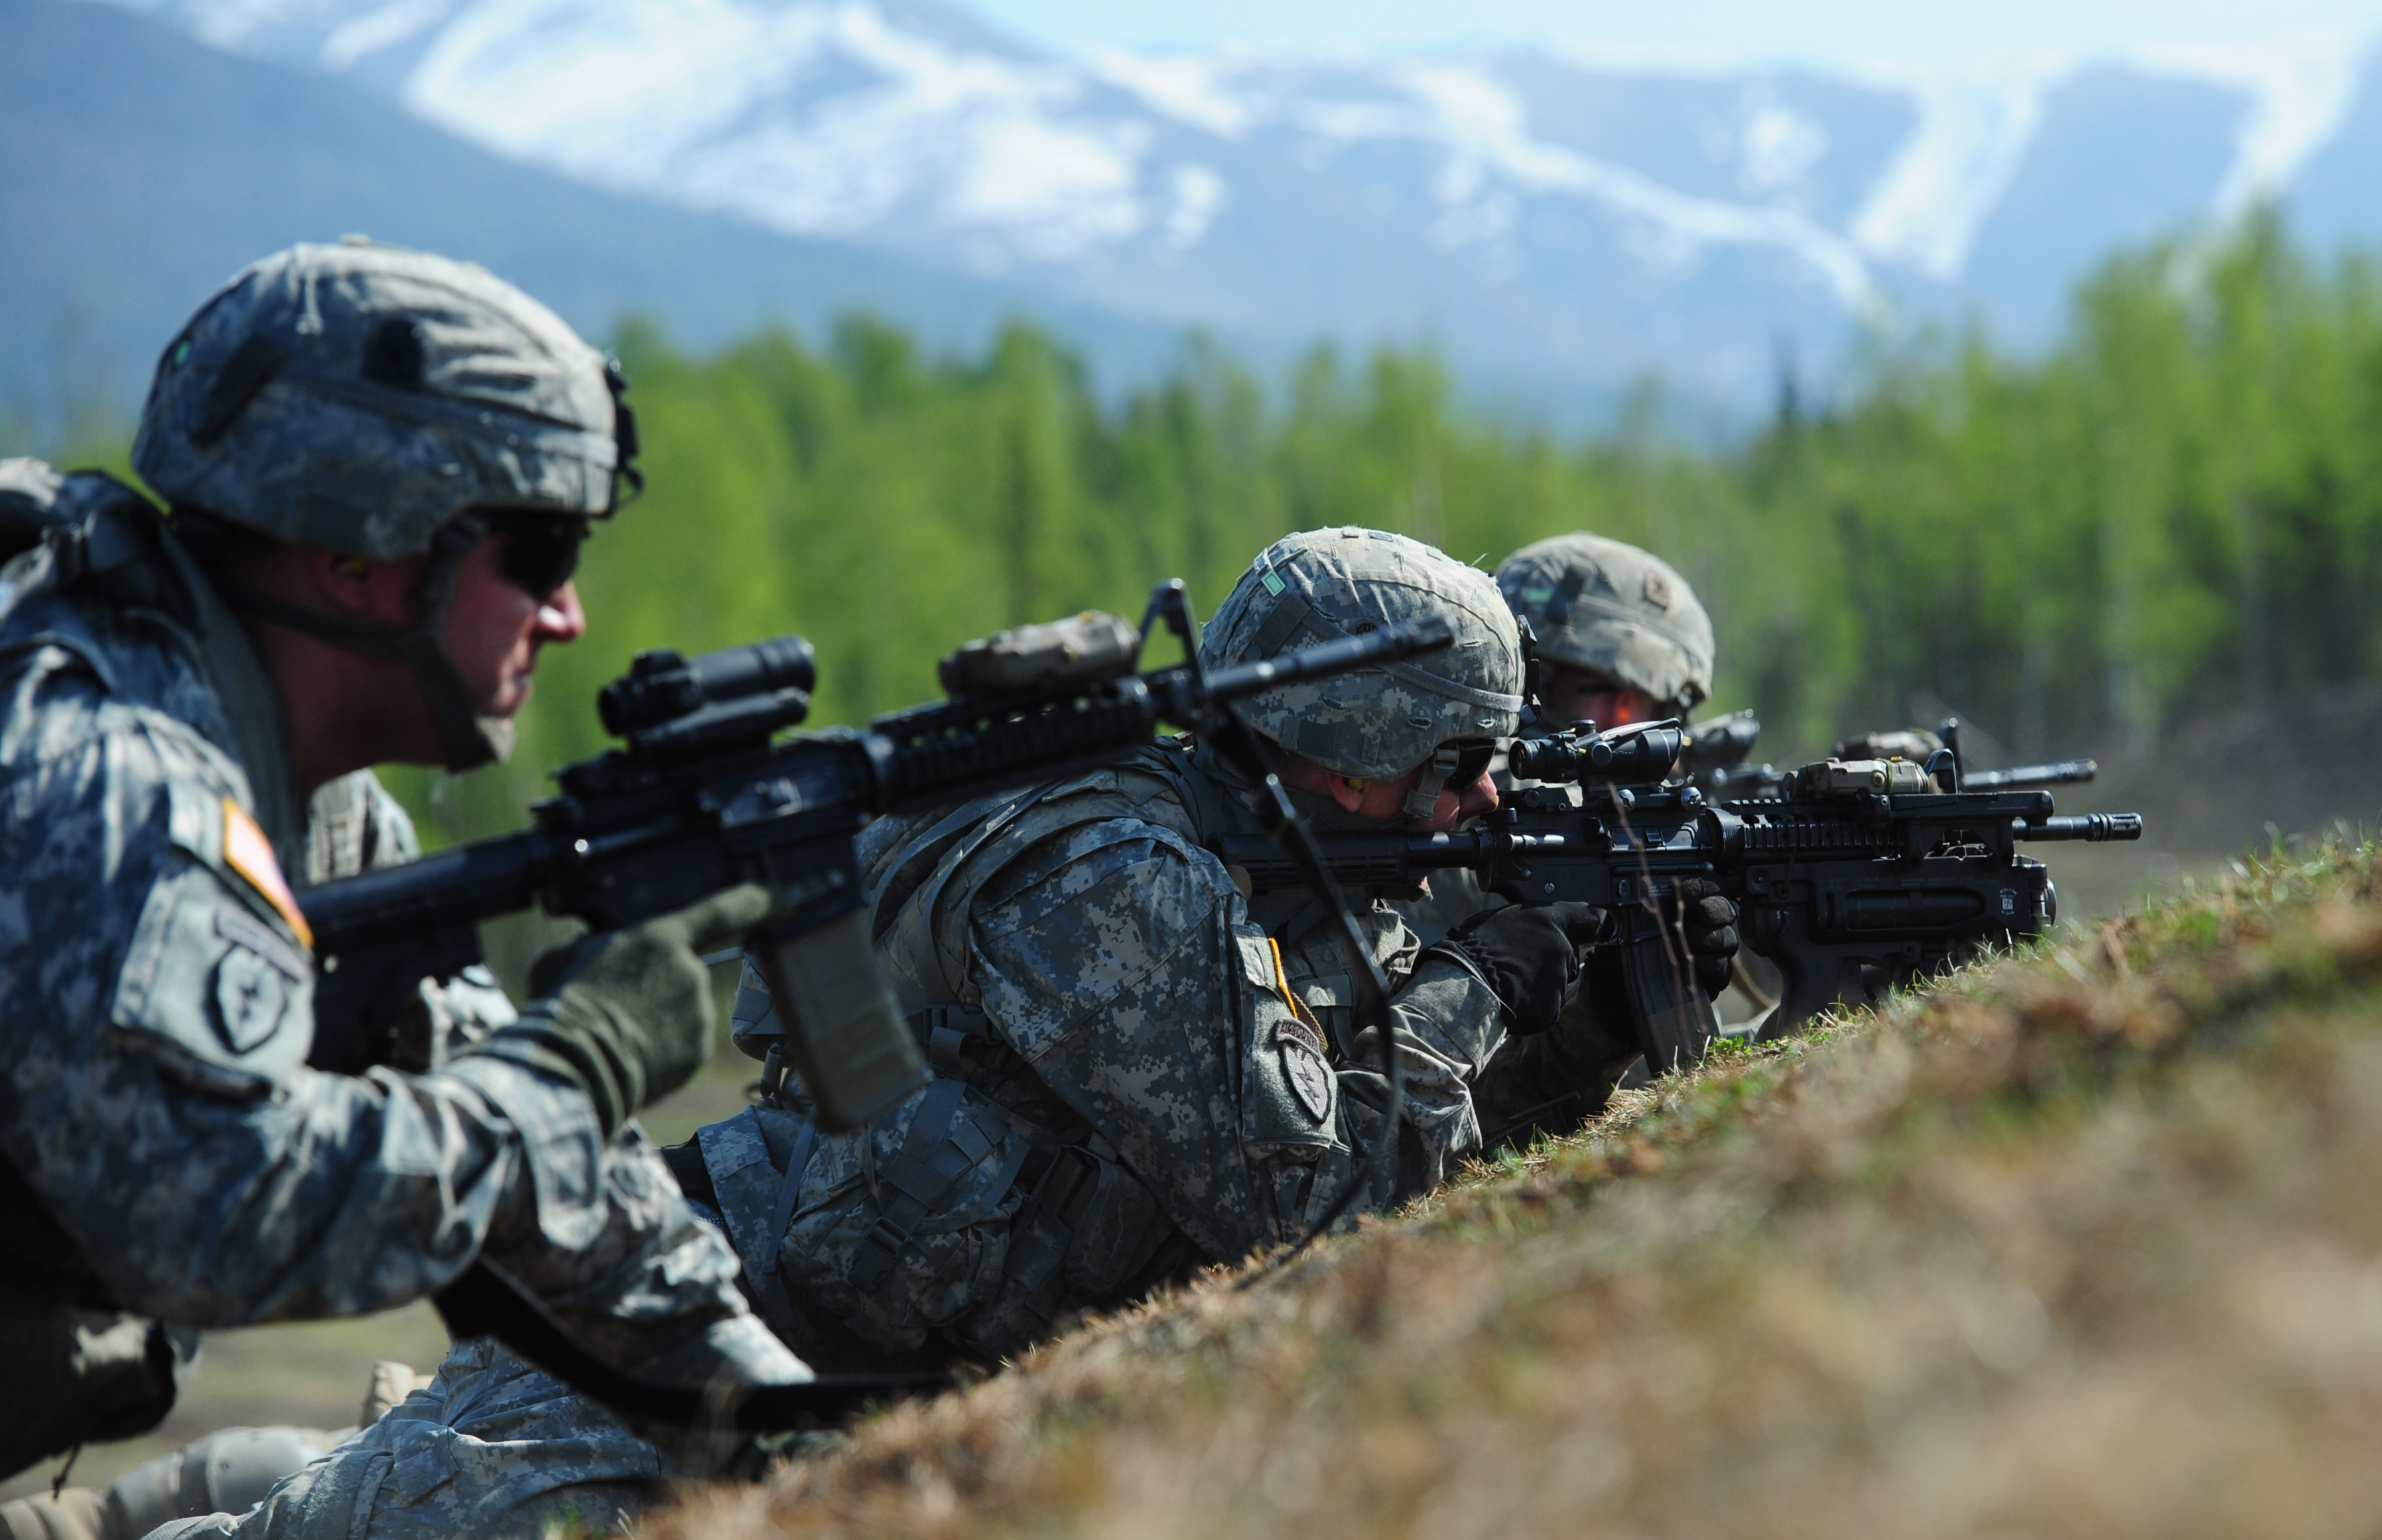
The main goal of an ambush is to surprise the enemy and attack with violence to inflict mass casualties. When arriving to the objective stealth and noise discipline should be the number 1 priority this might mean you have to low crawl to the objective.
The element of surprise is everything along with violence on the objective
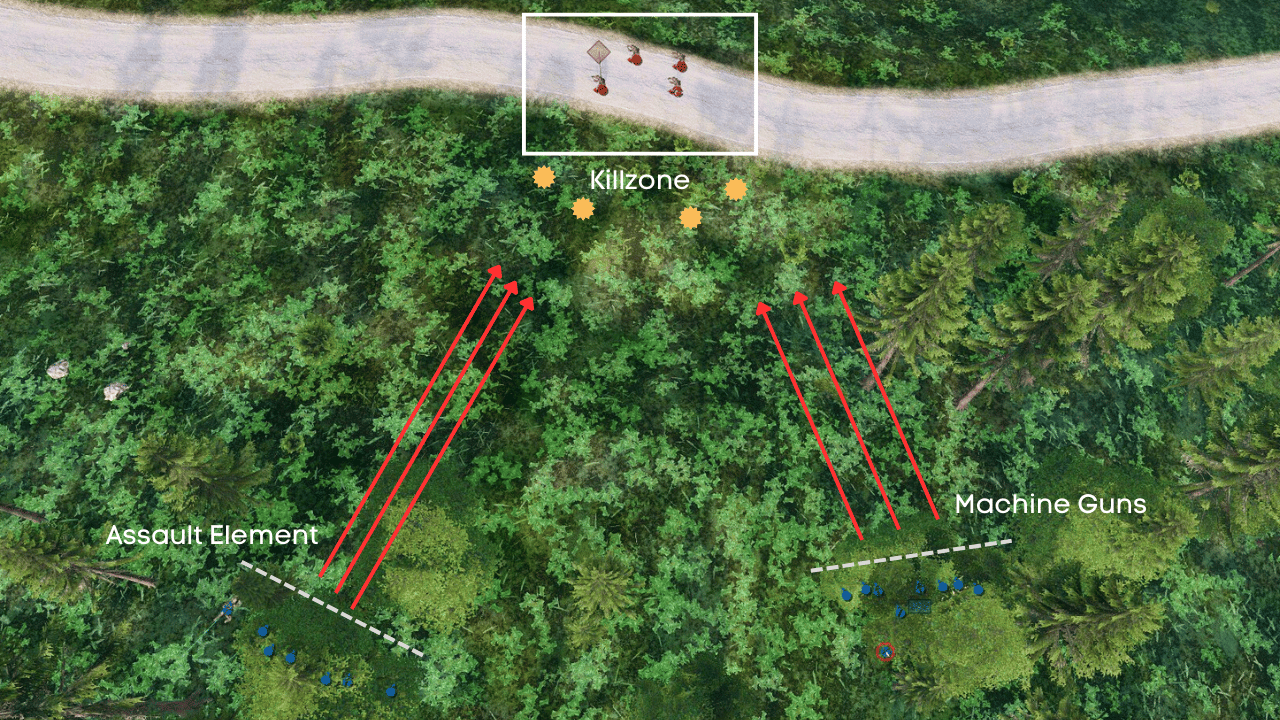
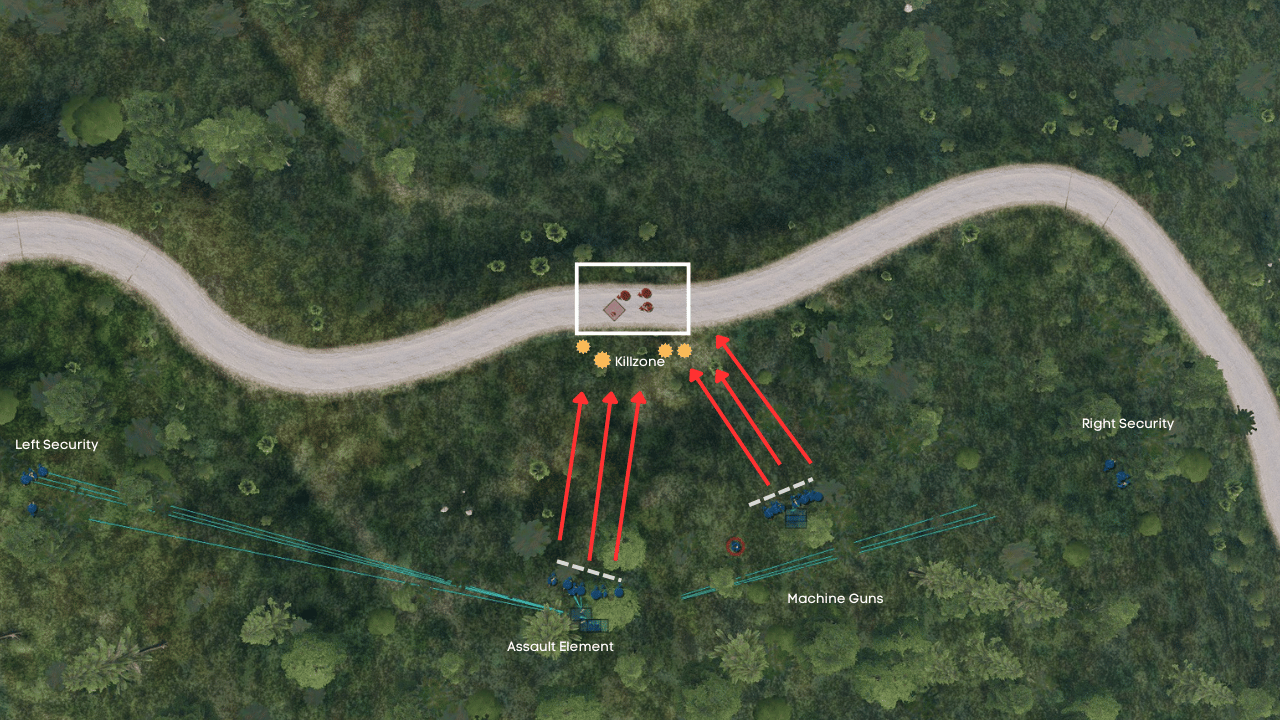
The main things you should consider when planning an ambush are:
- Complete coverage of the kill zone with direct and indirect fires.
- METT-TC analysis.
- Available resources (claymores, machine guns, indirect fires).
- Emplacement of security teams (with radios) to isolate the kill zone and provide early warning.
- Route to and occupation of the Limit of Advance (LOA).
General Planning Recap
For any patrol (including ambushes), consider:
- Tasks to subordinates: Assign clear task and purpose; delegate effectively.
- Requirements and security: Analyze terrain, weather, enemy situation, and cadre guidance.
- Special teams: Designate EPW search, Aid & Litter, Demolition (if applicable), and Security.
- Leaders’ Recon: Minimize personnel (typically PL, SLs, security) to reduce compromise risk.
- Objective survey: During recon, confirm kill zone suitability and adjust plan as needed.
Types
There exist hasty and deliberate ambushes, we will be focusing on deliberate ambushes
Categories:
- Point Ambush: Fires concentrated on a single kill zone.
- Area Ambush: Multiple related point ambushes (coordinated by higher HQ).
Formations:
- Linear: Assault line parallel to enemy route.
- L-Shaped: Assault line with support/security forming the “L” for enfilade fire.
We will learn about point ambushes only, that means that fire will be focused on 1 kill zone only.

Let’s go over how to conduct an ambush step by step, using a modified TLP format
1. Receive the mission
You will get your locations and obj. Ask if you can have any claymores as these are perfect for an ambush
2. Issue the WARNO
Disseminate the Who, What, Where, When and Why Repeat the mission statement you received in the WARNO
- Assign your teams: Assign who will be ASS1, ASS2, SEC and WPN Squads
- Assign your RTO, Pointman, and special teams, (EPW, Aid/Litter)
- Disseminate timelines and step off times
- Any major terrain or weather considerations
- Tasks and rehearsals to be conducted
- Disseminate ahead of time who will go on LR (All of Sec squad, PL/RTO, Pointman)
3. Make Tentative Plan/Issue OPORD
Note
This type of mission will require at least 2 security elements separated from the main body with radios. Take a radio from one of the assault squads and give it to the Alpha team leader of the security team. the SL will be with the other team.
Once the WARNO is disseminate and your subordinates have started their tasks, you can start working on the OPORD.
Disseminate as much as possible here, so you can solely focus on the OPORD.
Tip
Use your RTO to create a terrain model for you, and let your pointman handle route planning
Assign teams if you haven’t already. You will need primary and secondary EPW and Aid & Litter teams
For the plan you should start by considering METT-TC 1 and OAKOC 2 Know your environment and how it will affect the mission at hand
Complete the OPORD based on what you know and what the mission type is which in this case is an Ambush
Tip
Make to sure to create a PACE3 plan, Don’t just rely on your radios alone.
For an ambush, you have to decide who will initiate fire it can be the claymores, or the PL can start firing or it can be a whistle blow to initiate.
Note
Doctrinally speaking you should “Initiate fire with the highest casualty producing weapon” But at the same time “Fire should be initiated with a closed bolt weapon”. This rules out machine guns. I suggest the PL use claymores or instead take the first shots with an M4 and then everyone else can start firing
Have a Withdrawal plan. The go to is the Red, White, Blue plan4.
After you complete it, Pull your key leaders in for an OPORD brief and disseminate all info. Use your terrain model as much as possible to reinforce what need to be done. Back brief your squad leaders and make sure they know what the plan is
If you can, bring the Alpha team leaders to the meeting.
Important
Maintain 360 security at all times, PSG should handle this but check to make sure [!TIP] Emphasize Camo and Concealment when briefing. You want to sneak in to the objective and maintain noise discipline
PSG
As PSG you will make sure 360 security is set at all time, while PL is making the plan. Sectors of fire should be interlocked and noise discipline should be good
Assign a medic
Gather LACE5 reports and redistribute accordingly, request for more supplies if needed
You will create and brief CCP6, HLZ7 and AXP8 points. You can use your medic to help you out with this
4. Initiate Movement
After giving your OPORD, you are ready to move in to the ORP9
Important
Have PSG and medic be at the release point of the PB to count people out
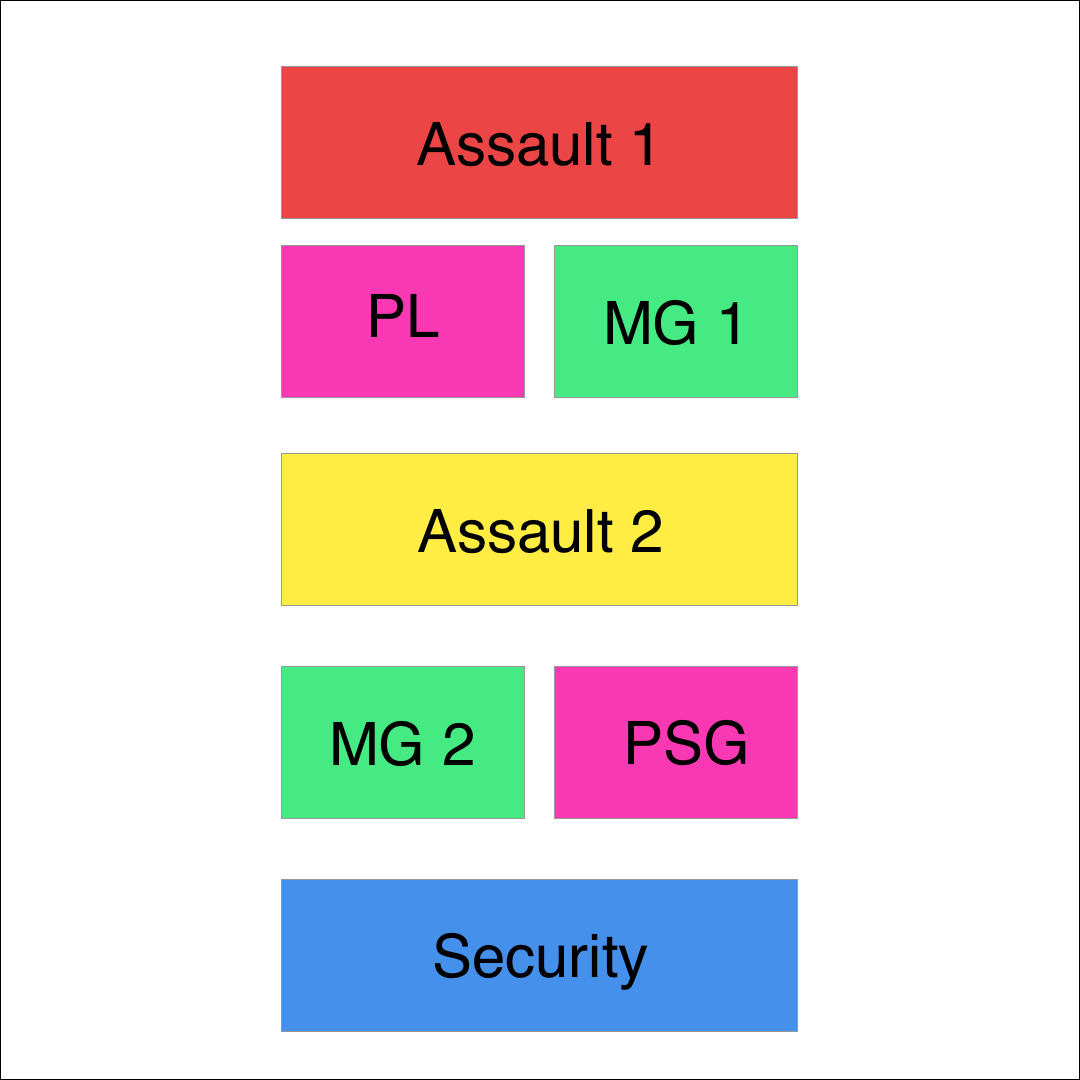
Here is an ORM10 I would typically use for this type of mission
Warning
Maintain noise discipline while moving to ORP. as you might get IDF’d
Once you arrive at the approximate location of the ORP the PL will conduct a SLLS11 halt and decide if it’s a good spot or not.
If it is then occupy the ORP.
Important
Have PSG and medic be at the front of the formation to count people in once you reach the ORP location
5. Conduct Reconnaissance
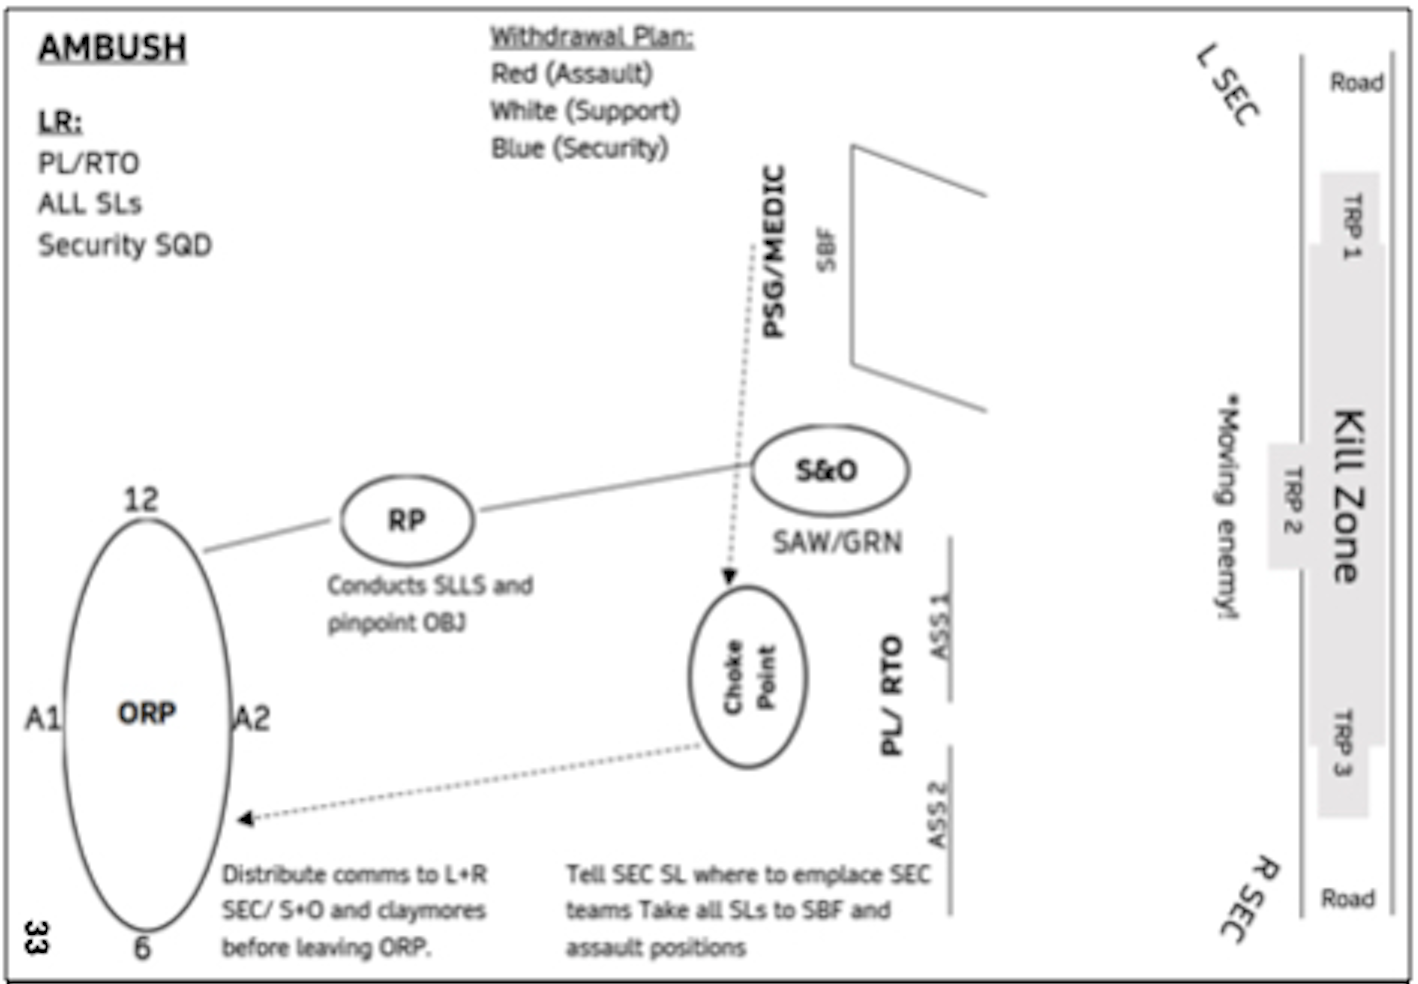
For this type of mission you will need Left and Right side security teams with radios. Take a radio from and assault squad SL and give them to the TL in the right or left side security teams
Reinforce where you want your squads to be at. You need to figure out where exactly you will emplace the machine guns, assaulting element, and left/right side security. This is why you are going on a leaders recon because things can change
Confirm PIR’s12 if you have any. set your kill zone. Once you are ready to leave, head to the release point. the PSG and Medic should be there to count out the leaders recon. Leave a GOTWA to the PSG
- G: Where you are Going
- O: Others you are taking with you
- T: Time you will take, or when you will back
- W What to do while you are gone (Maintain sec, other tasks)
- A: Action to do if you receive contact
Caution
The leaders recon MUST move tactically and quietly. High chance of being compromised
Once you leave the ORP, head to the OBJ and decide where your elements will be. I recommend personally emplacing each element if you have time. When emplacing your left and right side security you can just leave them there. Same goes with the security element in the middle and security SL. Discuss TRP’s with your squad leaders and make a decision on that
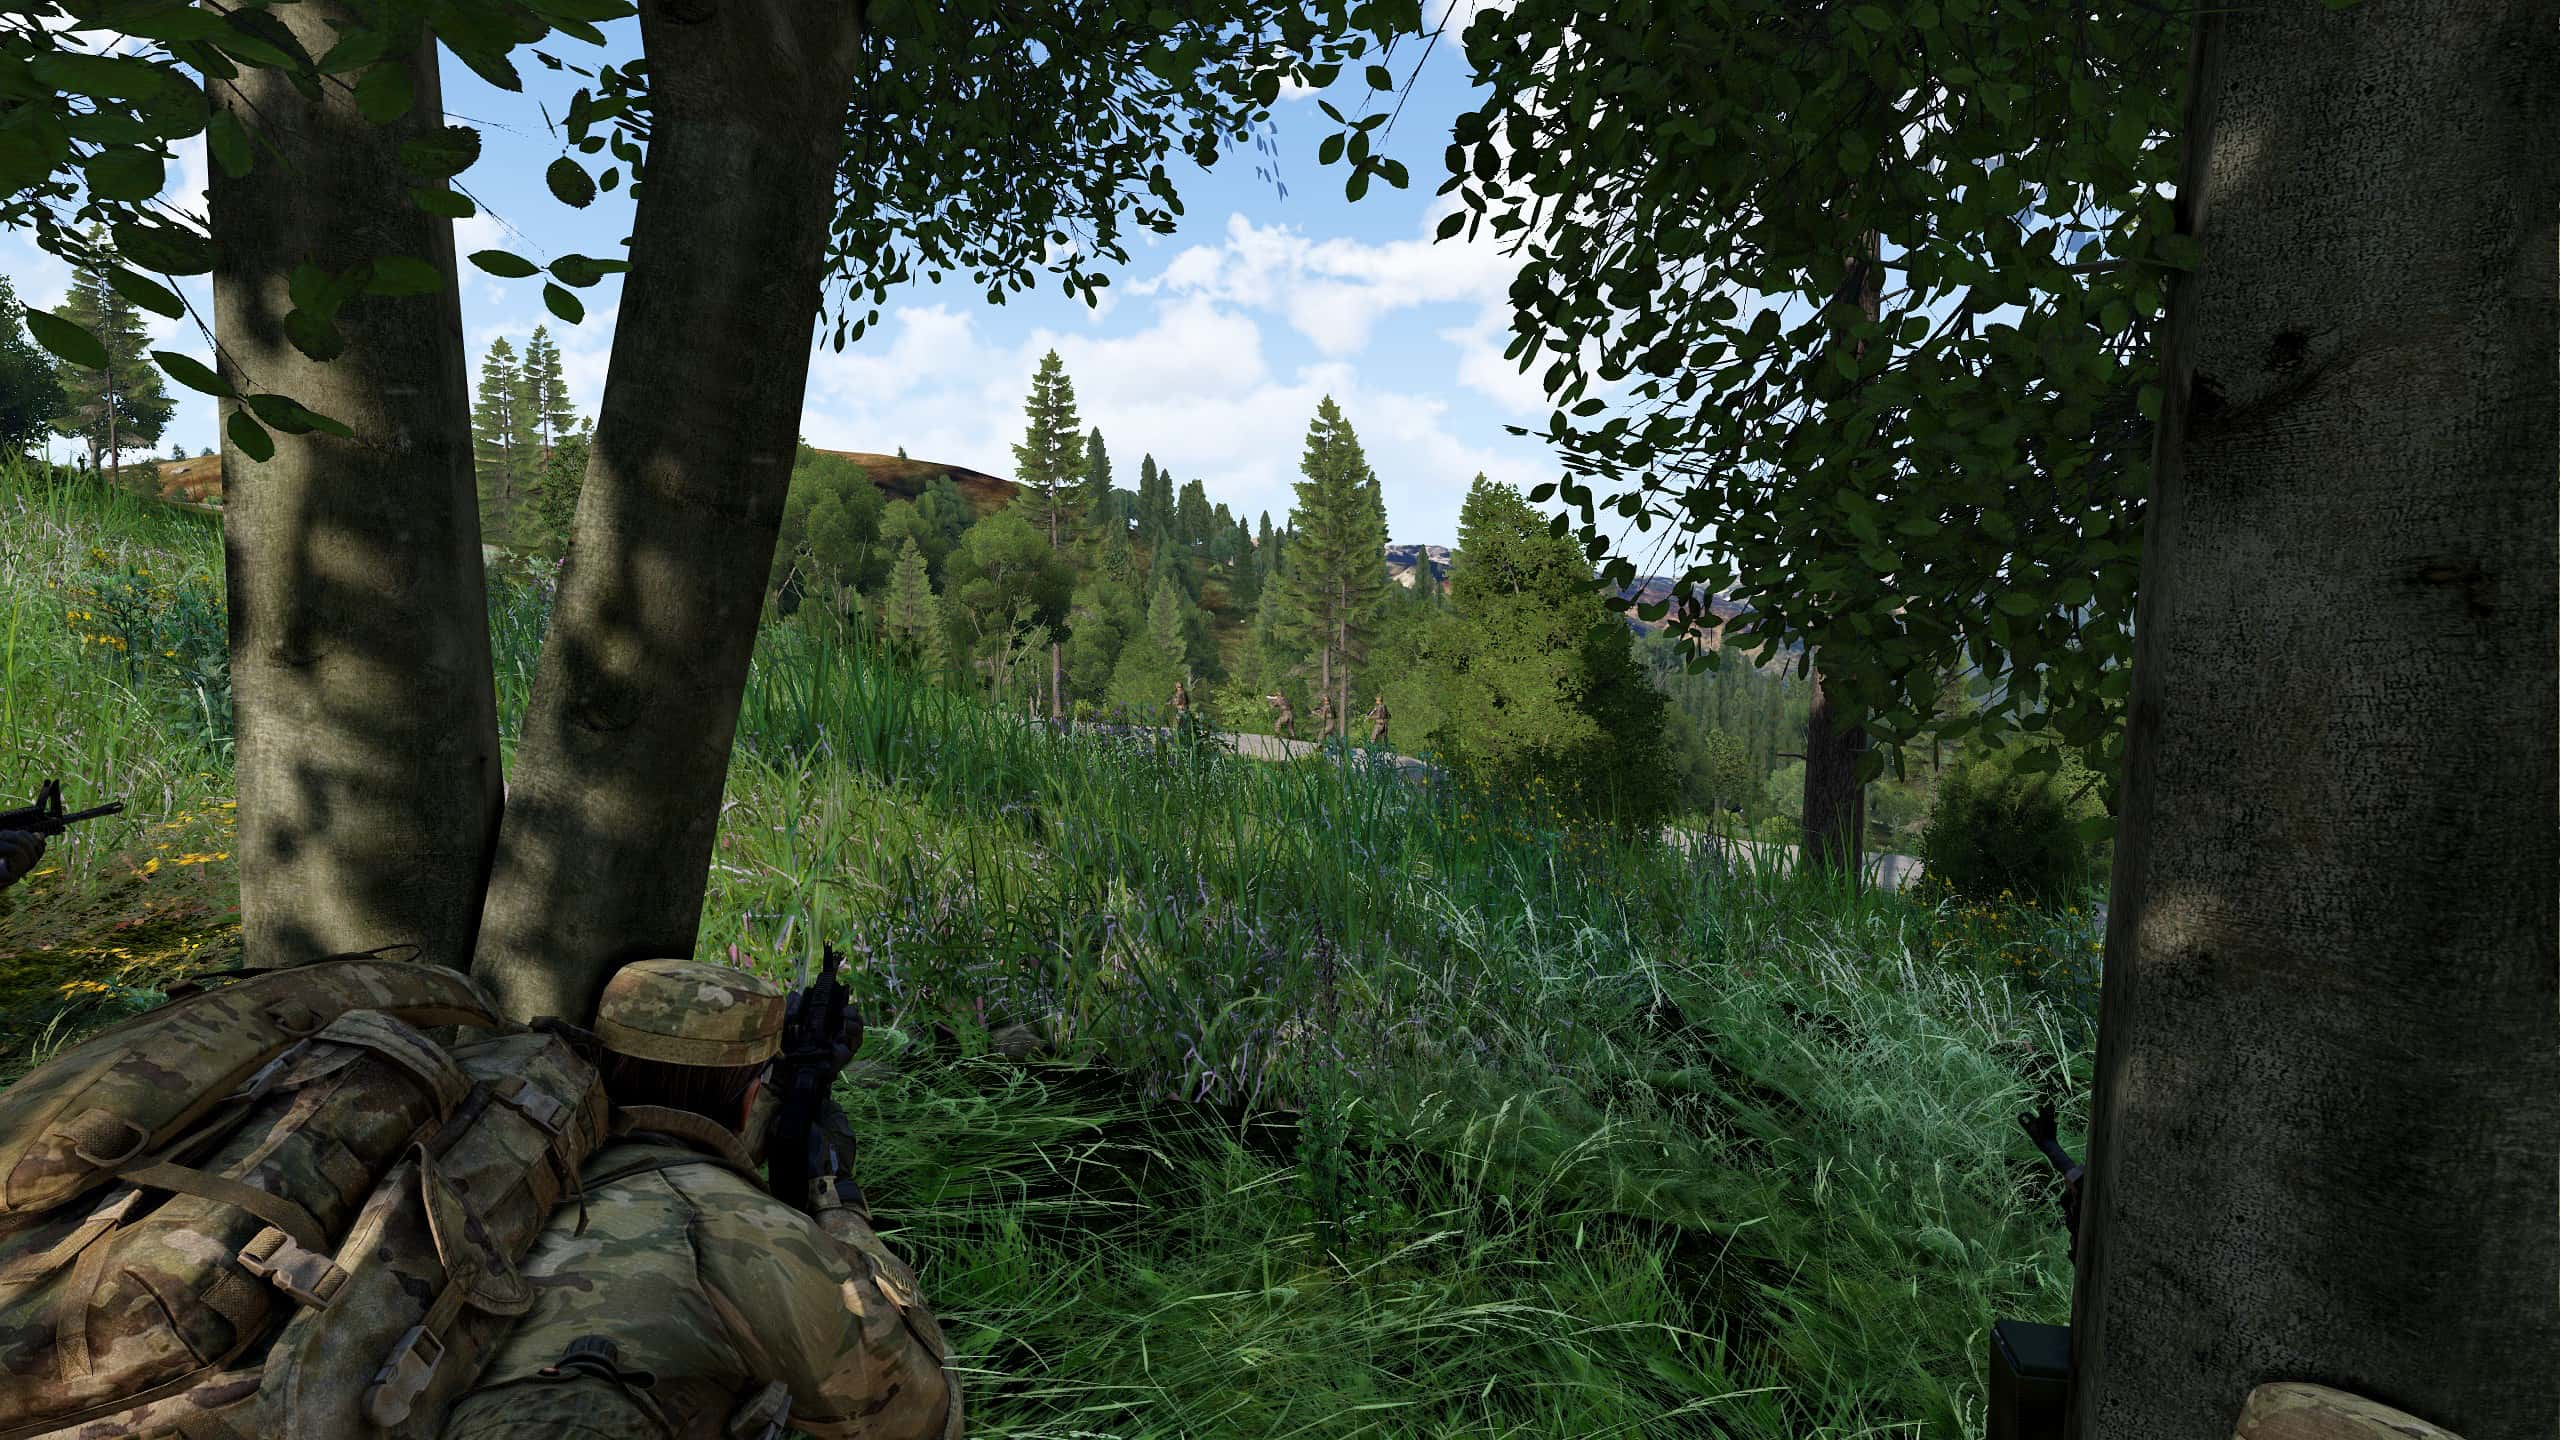
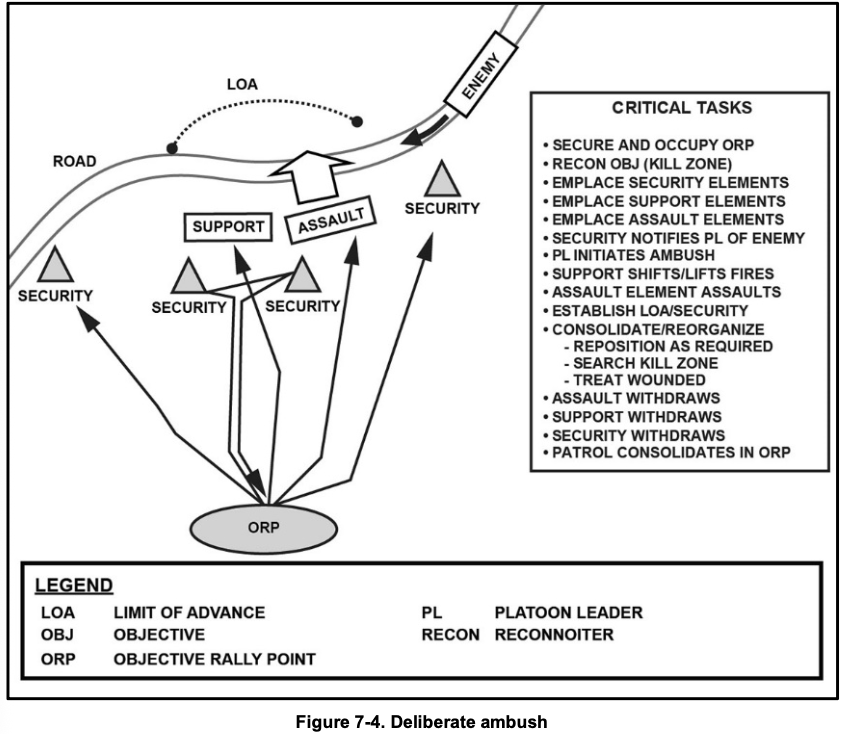
Overall do the following:
- Confirm OBJ location, select the killzone
- Emplace the left and right side security, identify LOA and boundaries
- Emplace the support elements
- The WSL assigns sectors of fire, using metal to metal contact to prevent fraticide
Tip
Leave MG positioning to the WSL
After you are done with the LR and everyone has a better understanding head back to the ORP to be counted in and prepare for movement
before leaving, give the sec SL a GOTWA.
PSG
While the PL is gone, PSG should supervise and refine the ORP. plug any security holes found and maintain noise discipline
Create a ruck plan. You can have everyone bring their rucks with them to the OBJ or you can leave 2 people behind at the ORP as ruck guards while everyone else assault the objective
I suggest stacking the rucks line by line according to squad
6. Complete the Plan
one the LR is done, refine and make any necessary changes to the plan. disseminate and let your subordinates know of any changes. Once ready, everyone picks up and leaves the ORP
PSG and Medic should count people out
Tip
Don’t just have everyone pickup at the same time. try to maintain security
8. Supervise and Refine
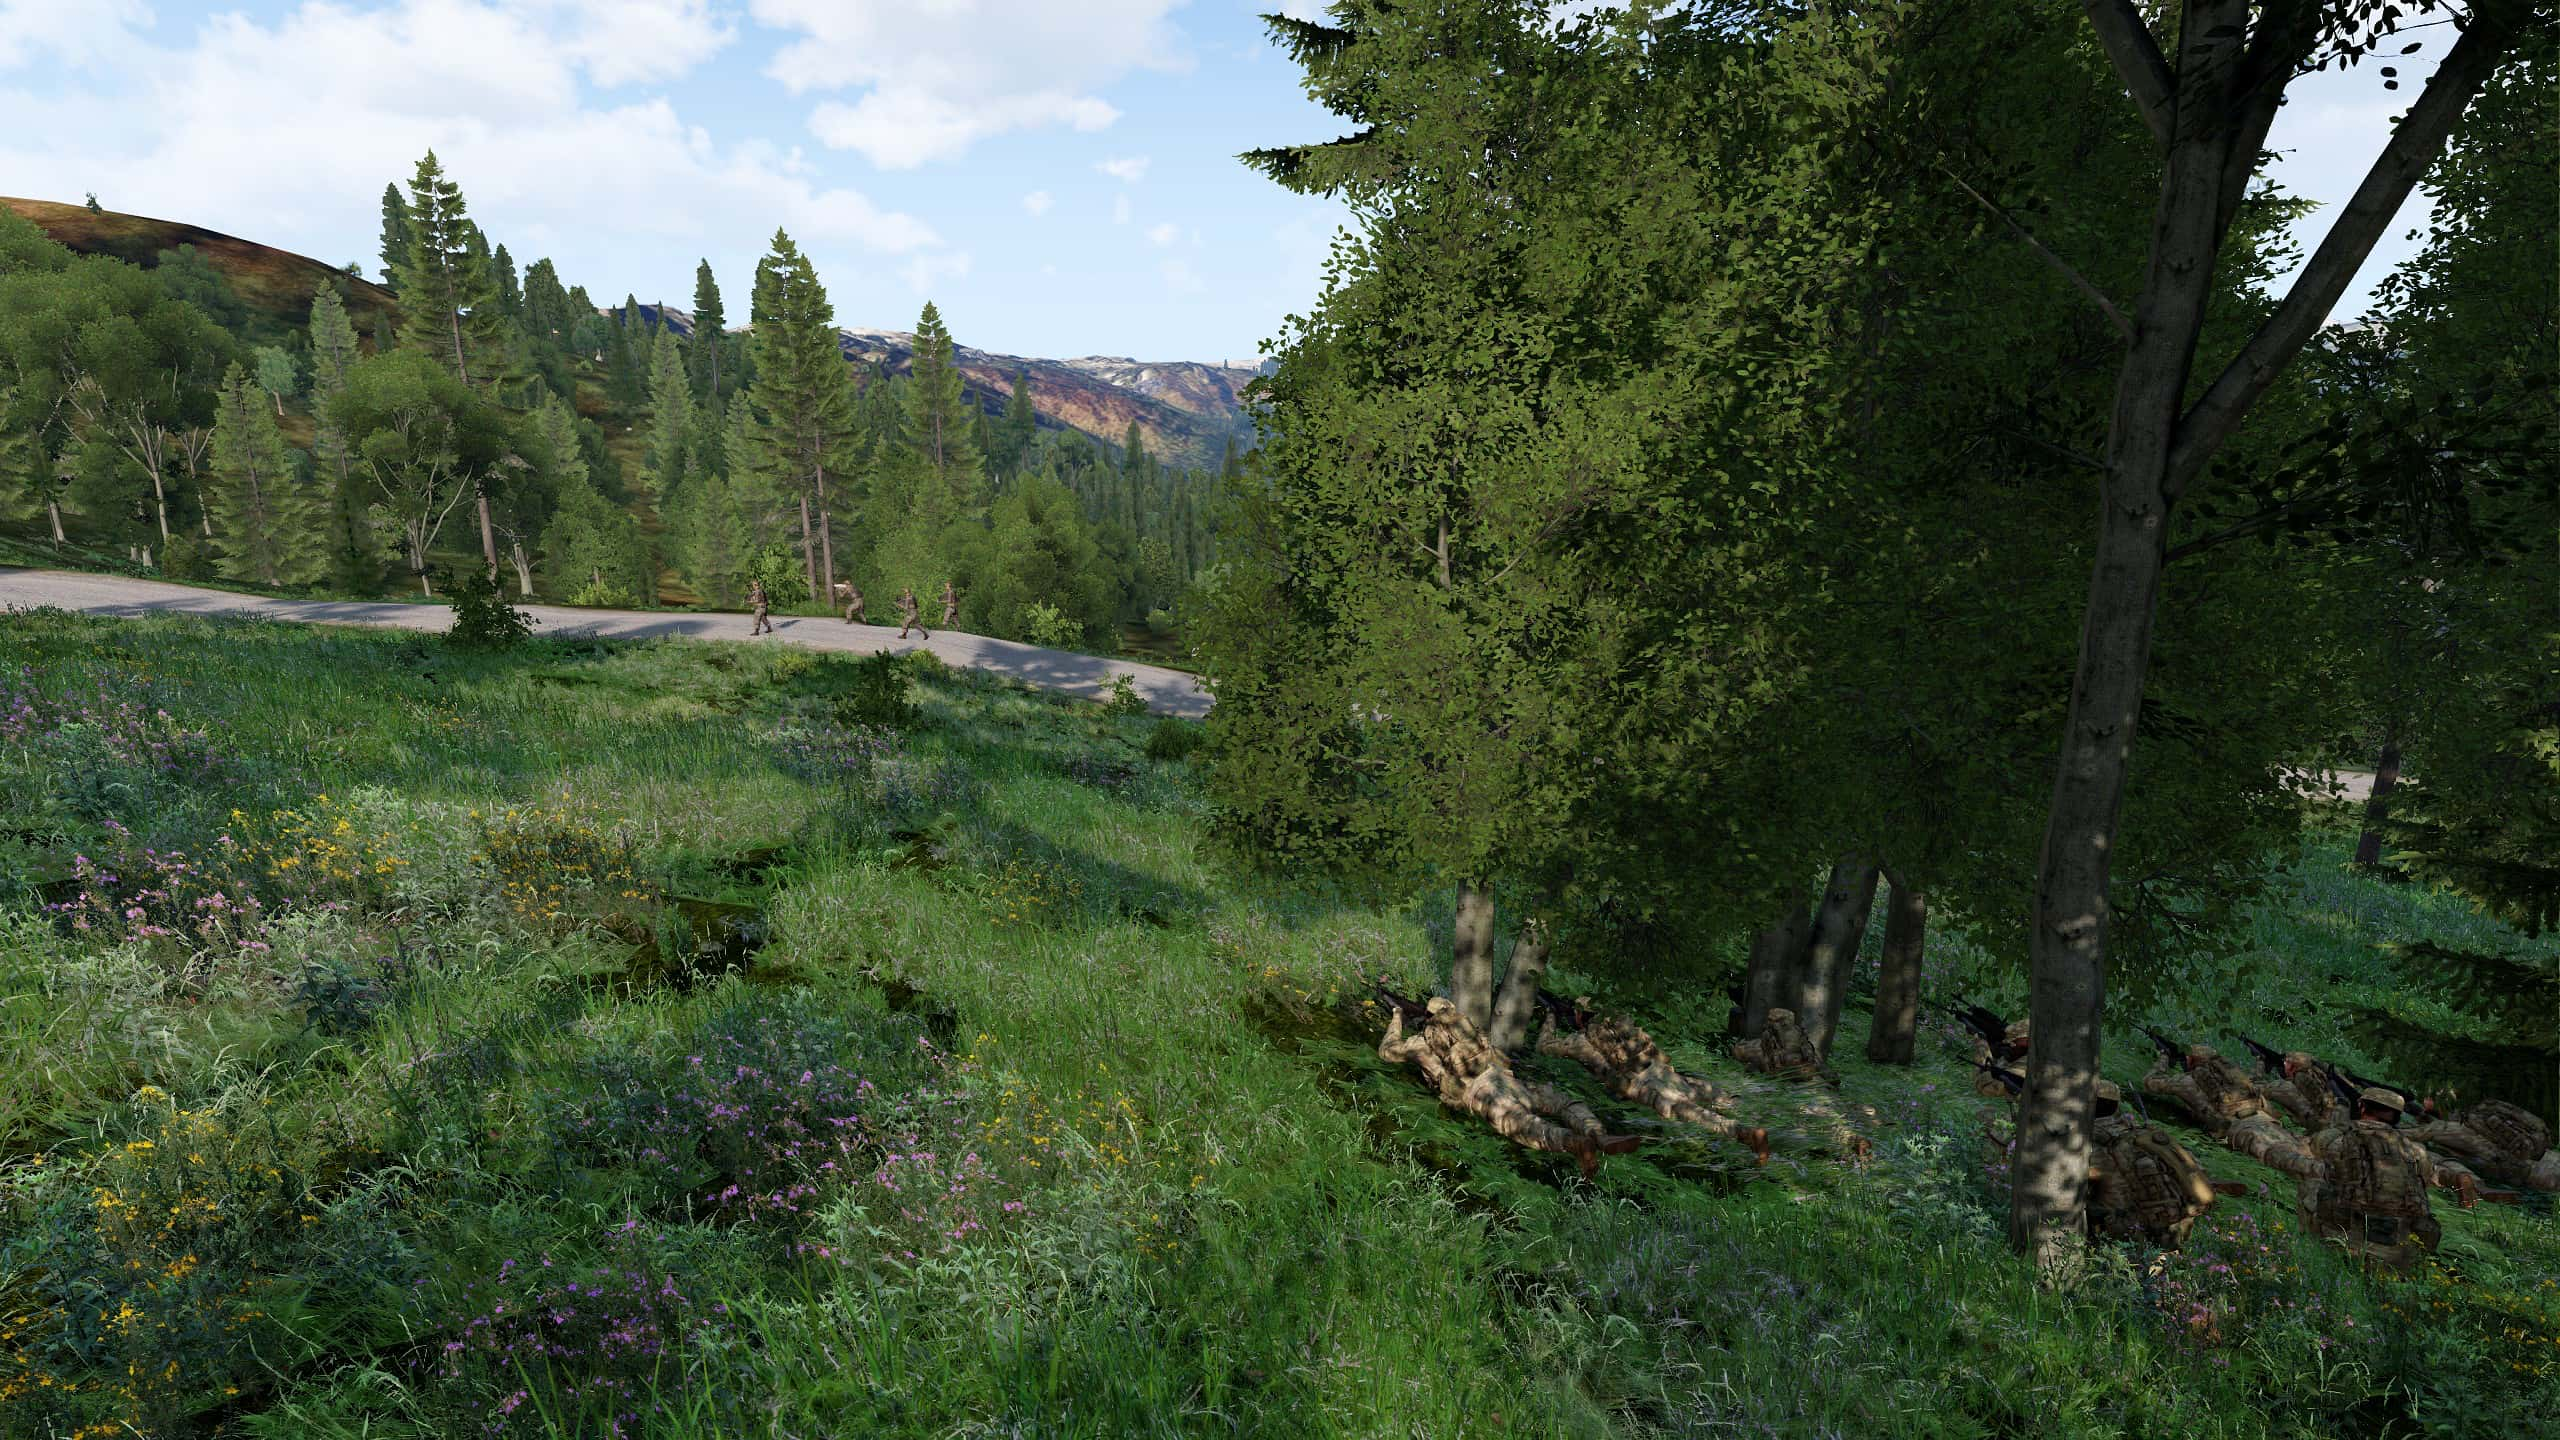
The Squad leaders will instruct their squads on positioning.
Setup the machine guns one at a time
Let the WSL handle his MG’s no need to have the PSG near there Have the PSG and PL together near the assaulting element
Tip
There is no doctrinal placement for PSG and PL they are supposed to be “Where they can control the mission effectively”
Once the machine guns and assaulting elements are set in position, you simply wait for the enemy to reach the kill zone
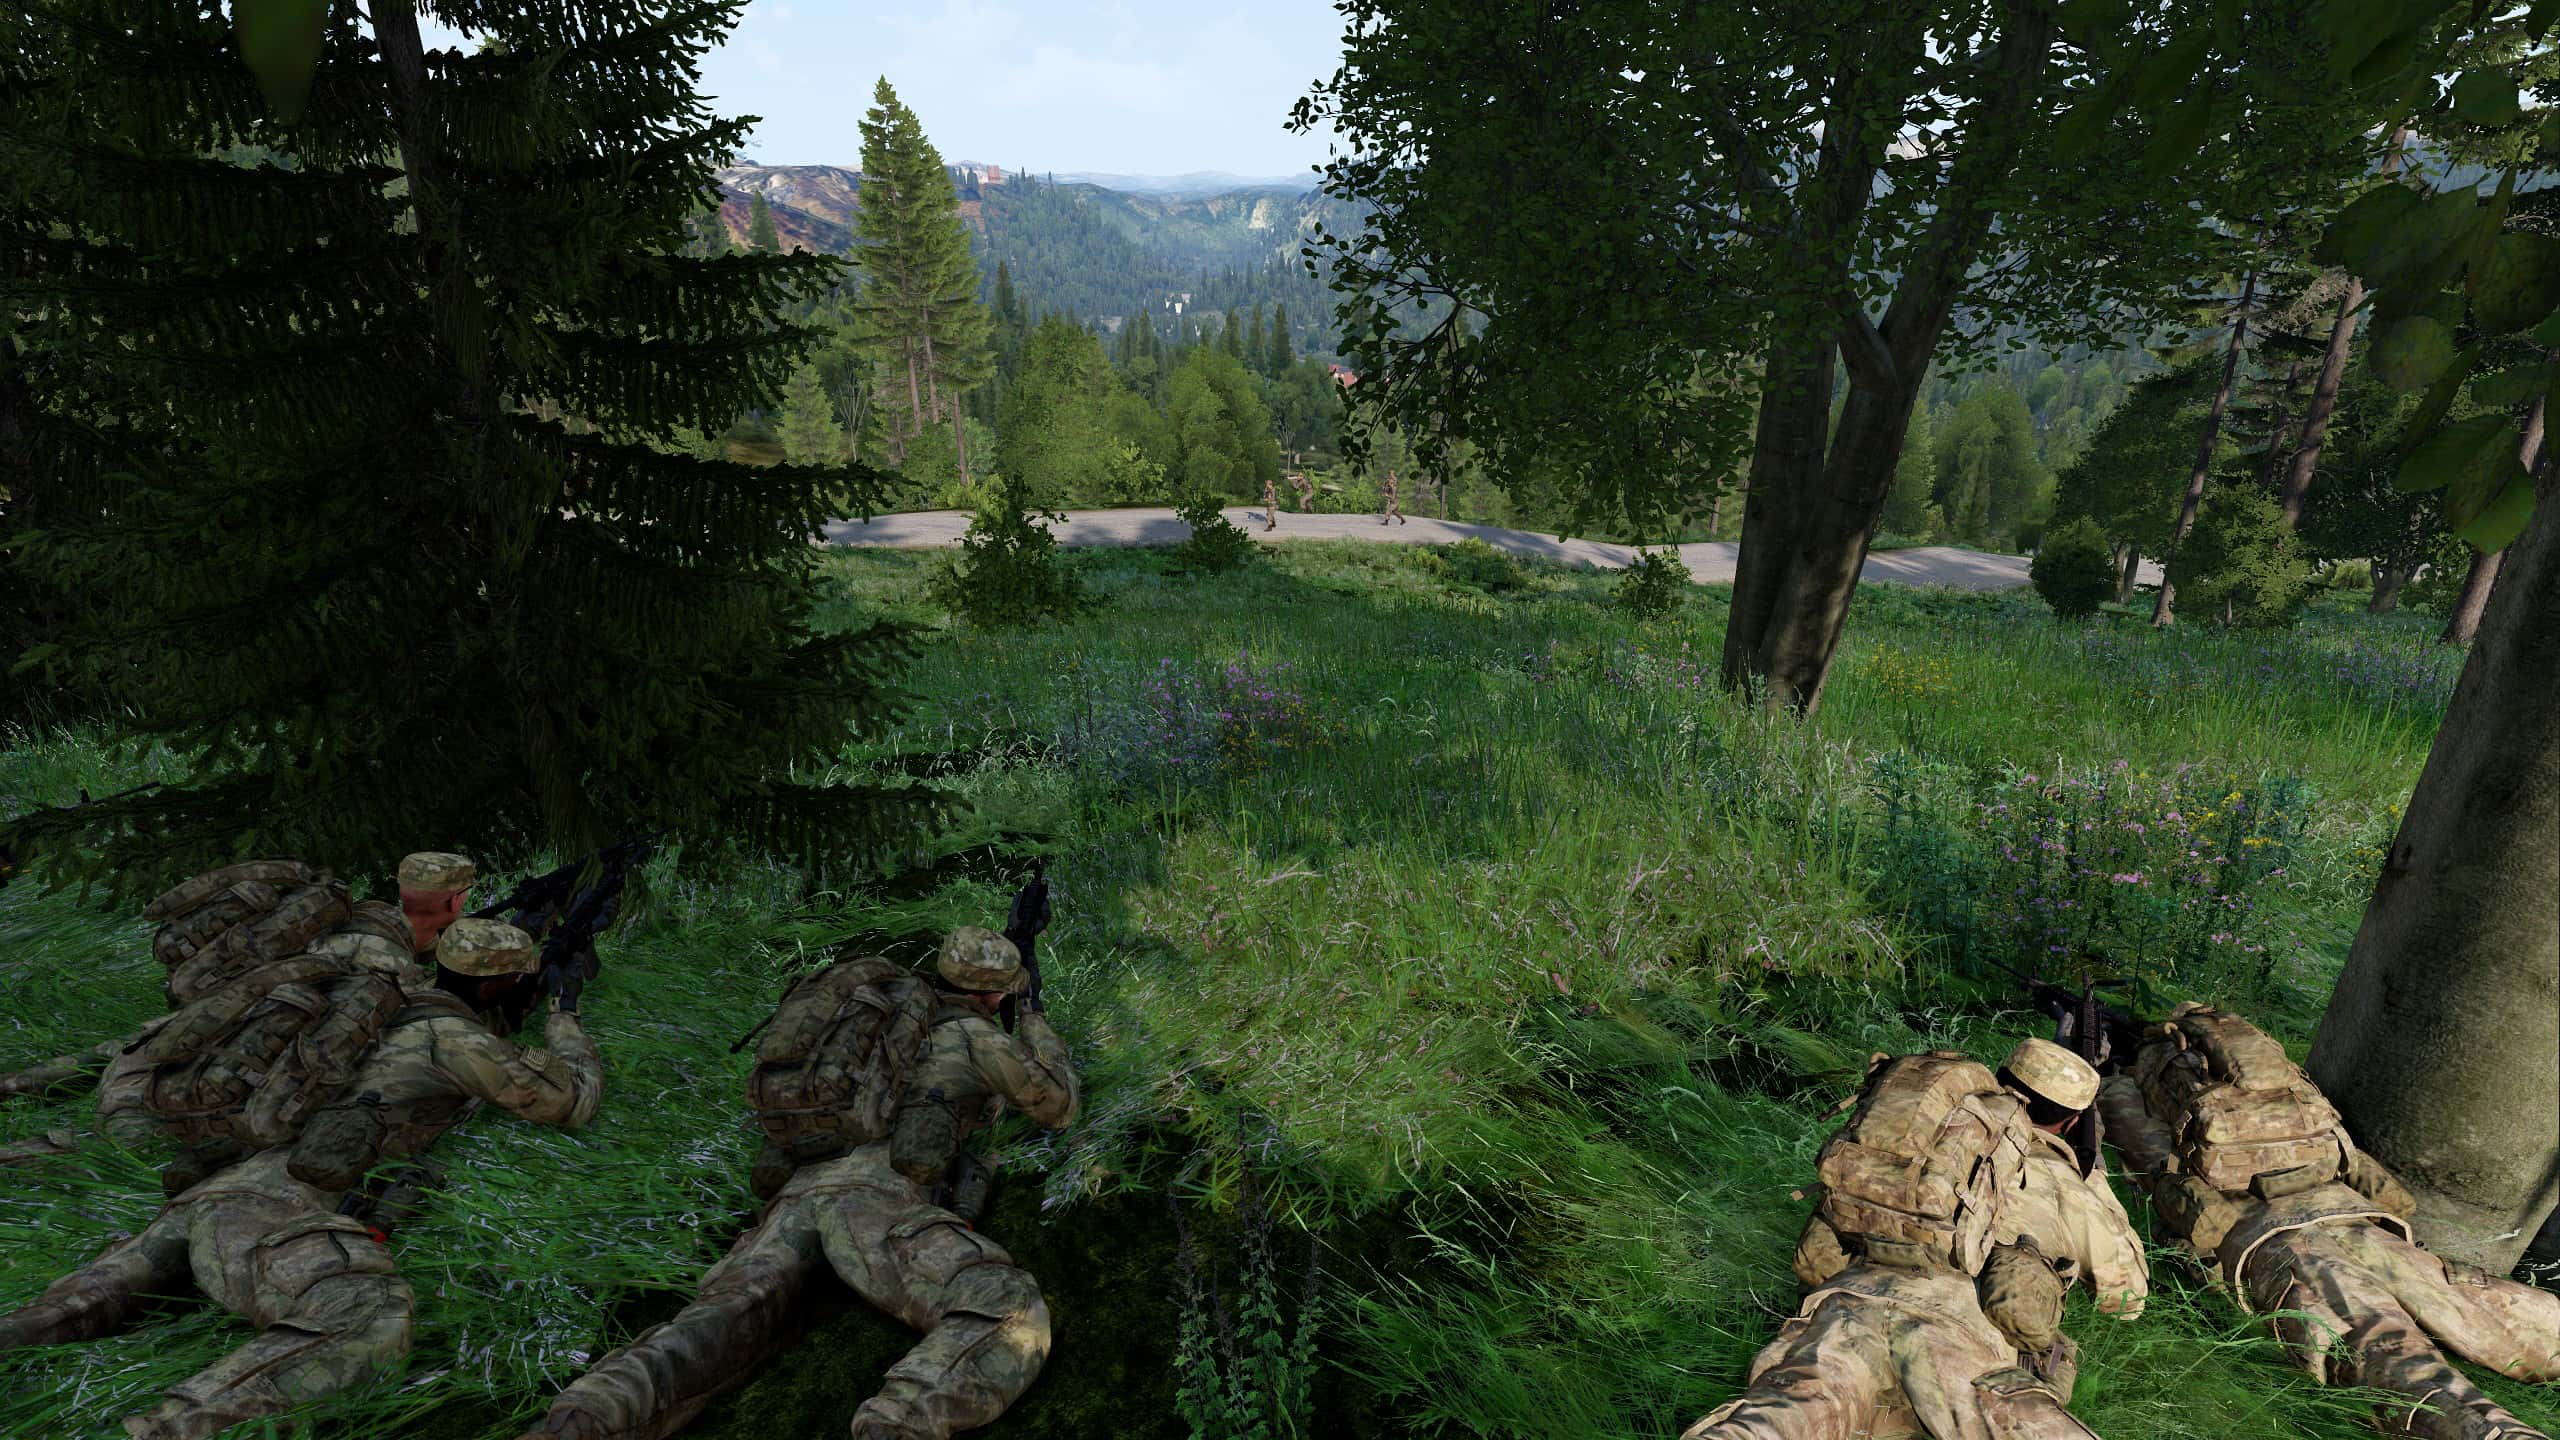
the left and right security elements will give a heads up if they detect enemy on the way. They will not be doing any shooting unless attacked first
Once the enemy reaches the Kill zone. Open up with your predetermined method Doctrinally it’s the highest casualty producing weapon but you can use something else like a whistle blow or claymores

conduct the “Mad Minute” and radio higher that you reached contact with the enemy
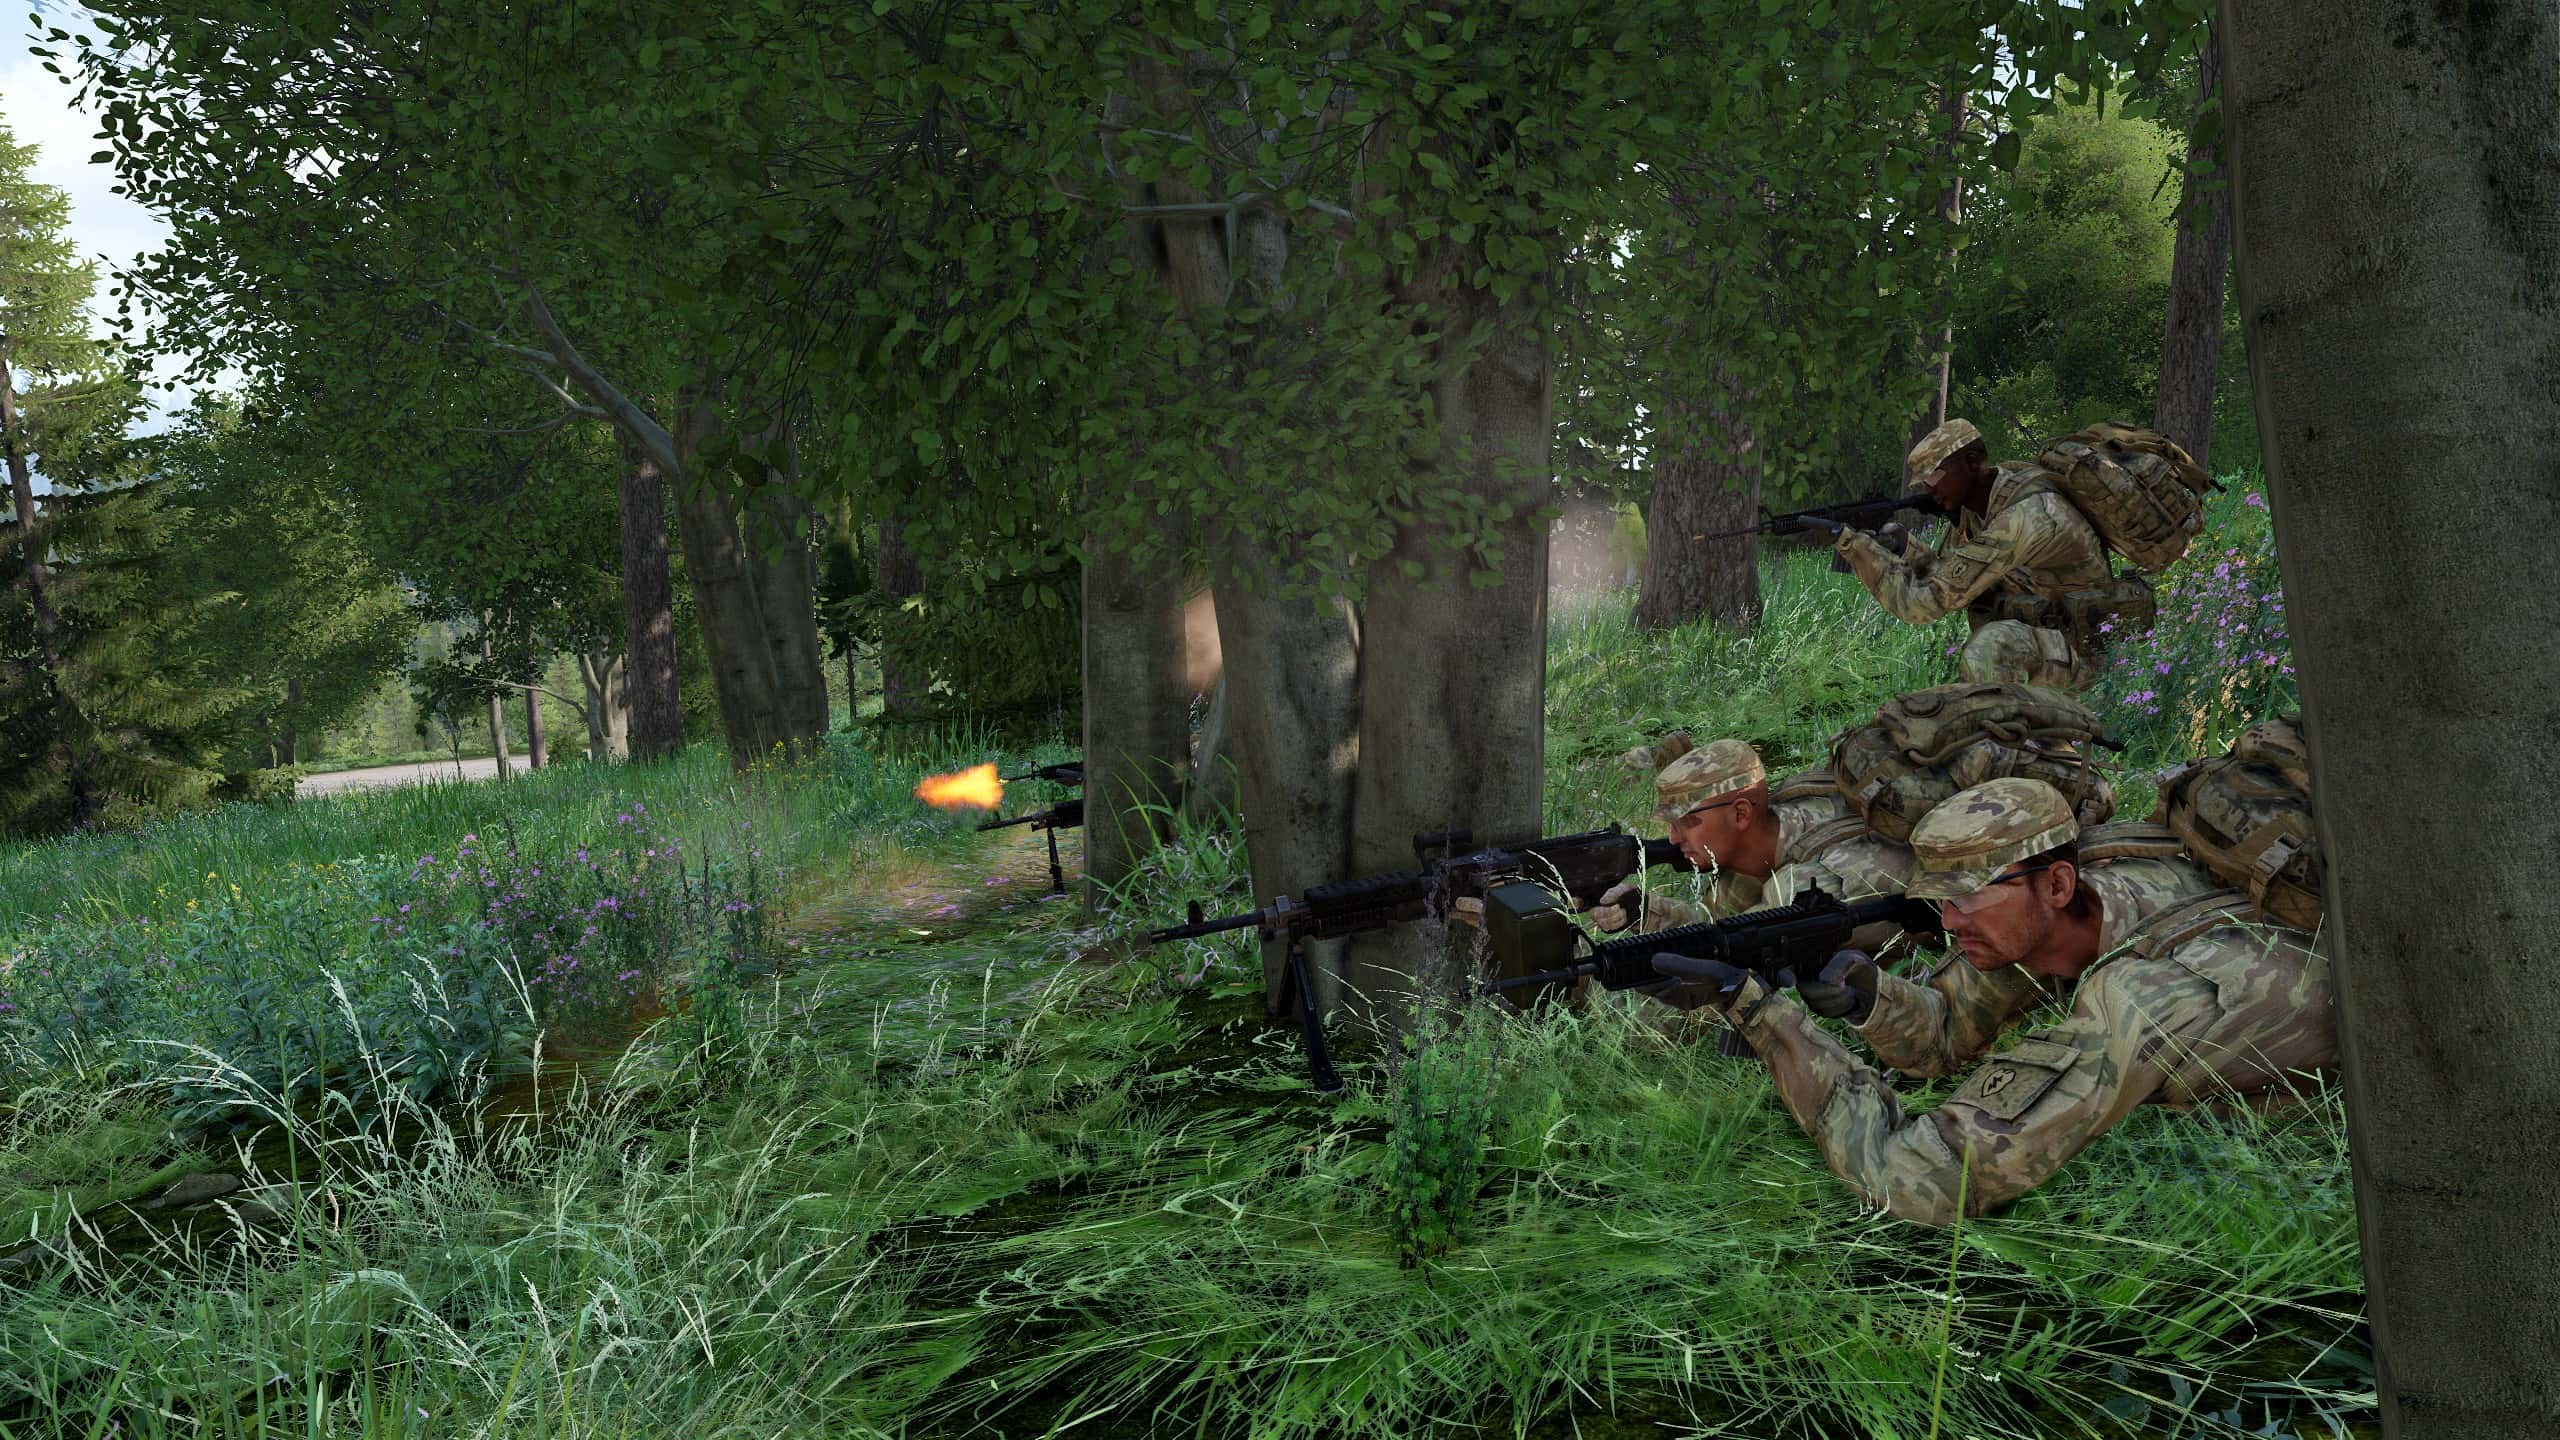
Before assaulting through the PL should signal the MG team to lift or shift fires and receive confirmation
After that call for shift fire and let the assaulting element assault to the LOA
Once LOA is reached cease all fire and conduct EPW and then Aid & Litter tasks.
Important
Maintain 360 sec at all times once you reach LOA
PSG will collect LACE reports from the squad leaders and then report to higher
Withdrawal
Conduct Withdrawal plan. Don’t remain on the objective for more than 5-10 minutes. You want to go in and out as quickly as possible
Gather any enemy intel and report to higher
Red white blue plan
- Red: Assault elements withdraw
- White: Machine guns withdraw
- Blue: Security withdraw
Afterwards move back to the ORP and await for next mission. At the ORP conduct headcount and redistribute ammo/supplies
Contingency
There are fewer things that can go wrong when compared to other missions.
With this type of mission, some OPFOR flee the killzone and tend to strike from the left or right side of the ambush formation potentially wiping out your security element if they are not prepared
OPFOR is also known to attack from behind, so have a security element placed there to keep watch
In addition, there are cases where OPFOR might jump back to life and strike your element after they move towards the LOA
Caution
DON’T GET COMPROMISED. Especially during the Leaders Recon. This will mess up your lane. I suggest low crawling even though it might suck.
Tips
- Use claymores for initiation and maximum shock.
- Position machine guns for enfilade fire.
- Rehearse initiation, lift/shift, and withdrawal. Have backup communication with this
- Maintain strict noise/light discipline during occupation.
- Place security far enough to provide warning but not compromise main force.
What not to do
- Initiate too early/late (miss kill zone).
- Bunch up during occupation.
- Forget to lift/shift fires before assault.
- Linger on objective.
- Neglect 360 security at LOA.
Closing
Don’t be compromised, and make sure the enemy is dead
-
Mission, Enemy, Terrain and Weather, Troops available, Time available, Civil considerations ↩︎
-
Observe and Fields of Fire, Avenues of approach, Key and decisive terrain, Obstacles, Cover and concealment ↩︎
-
Basically a communications plan, Primary is Radio, Secondary is hand arms signals, third is runner, contingency is shouting ↩︎
-
When PL shouts “Red”, The assault elements withdraw from the objective, on “White” WPN Squad withdraws on “Blue” Security withdraws ↩︎
-
Liquid, Ammo, Casualties. A report from Squad leaders informing how the squad is doing in supplies and health ↩︎
-
Casualty Collection Point ↩︎
-
Helicopter Landing Zone, for Medevac usually marked by a VS panel ↩︎
-
Ambulatory Exchange point, near a road ↩︎
-
Objective Rally Point ↩︎
-
Order of March, Where squads will be when moving to he objective ↩︎
-
Stop listen look smell. A method to see if the area is suitable for an ORP or PB ↩︎
-
Priority intelligence requirement ↩︎